Follow Me On Social Media!
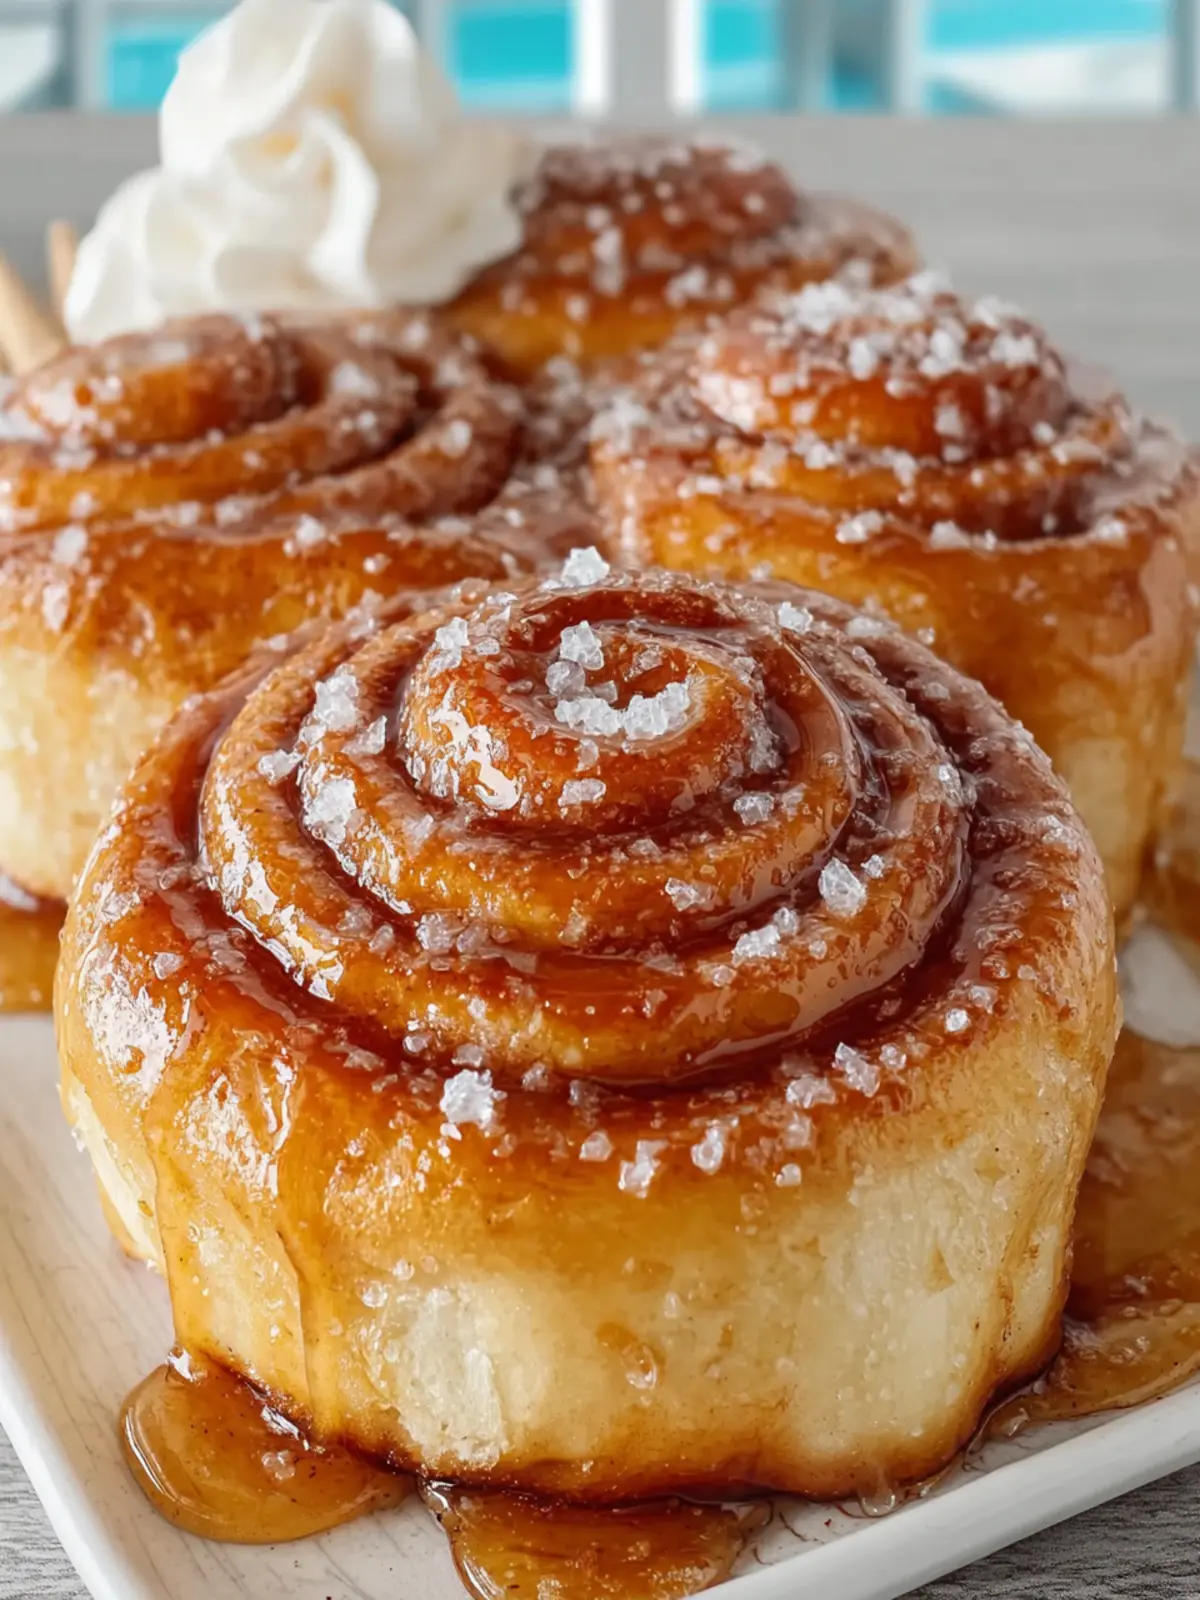
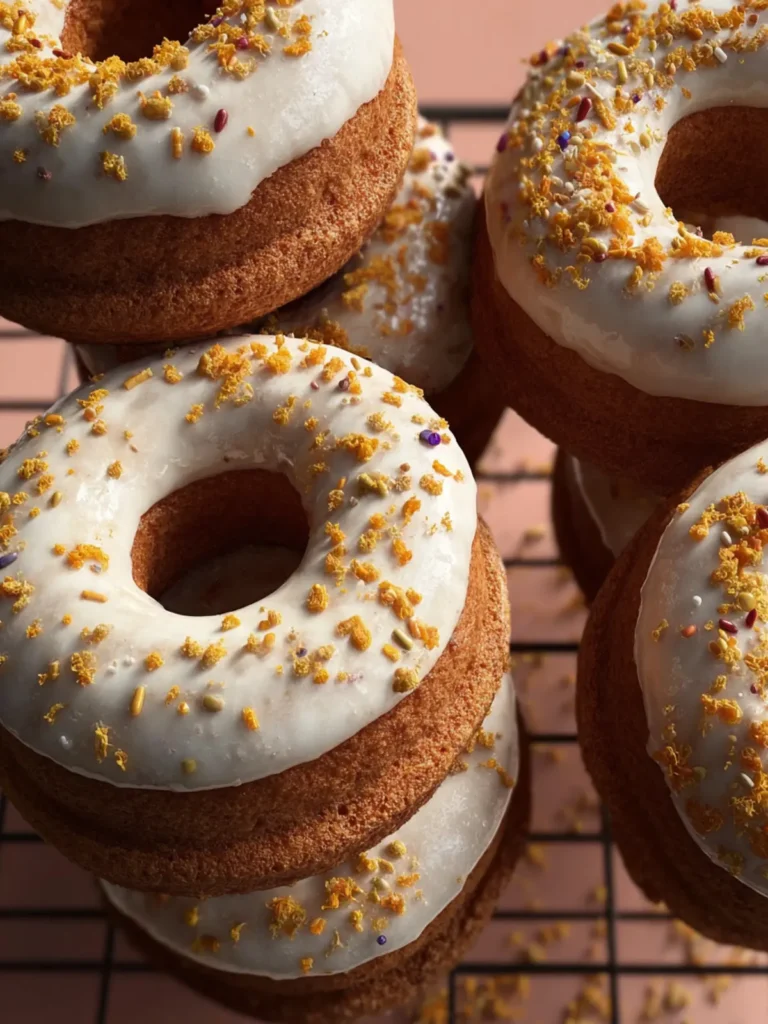
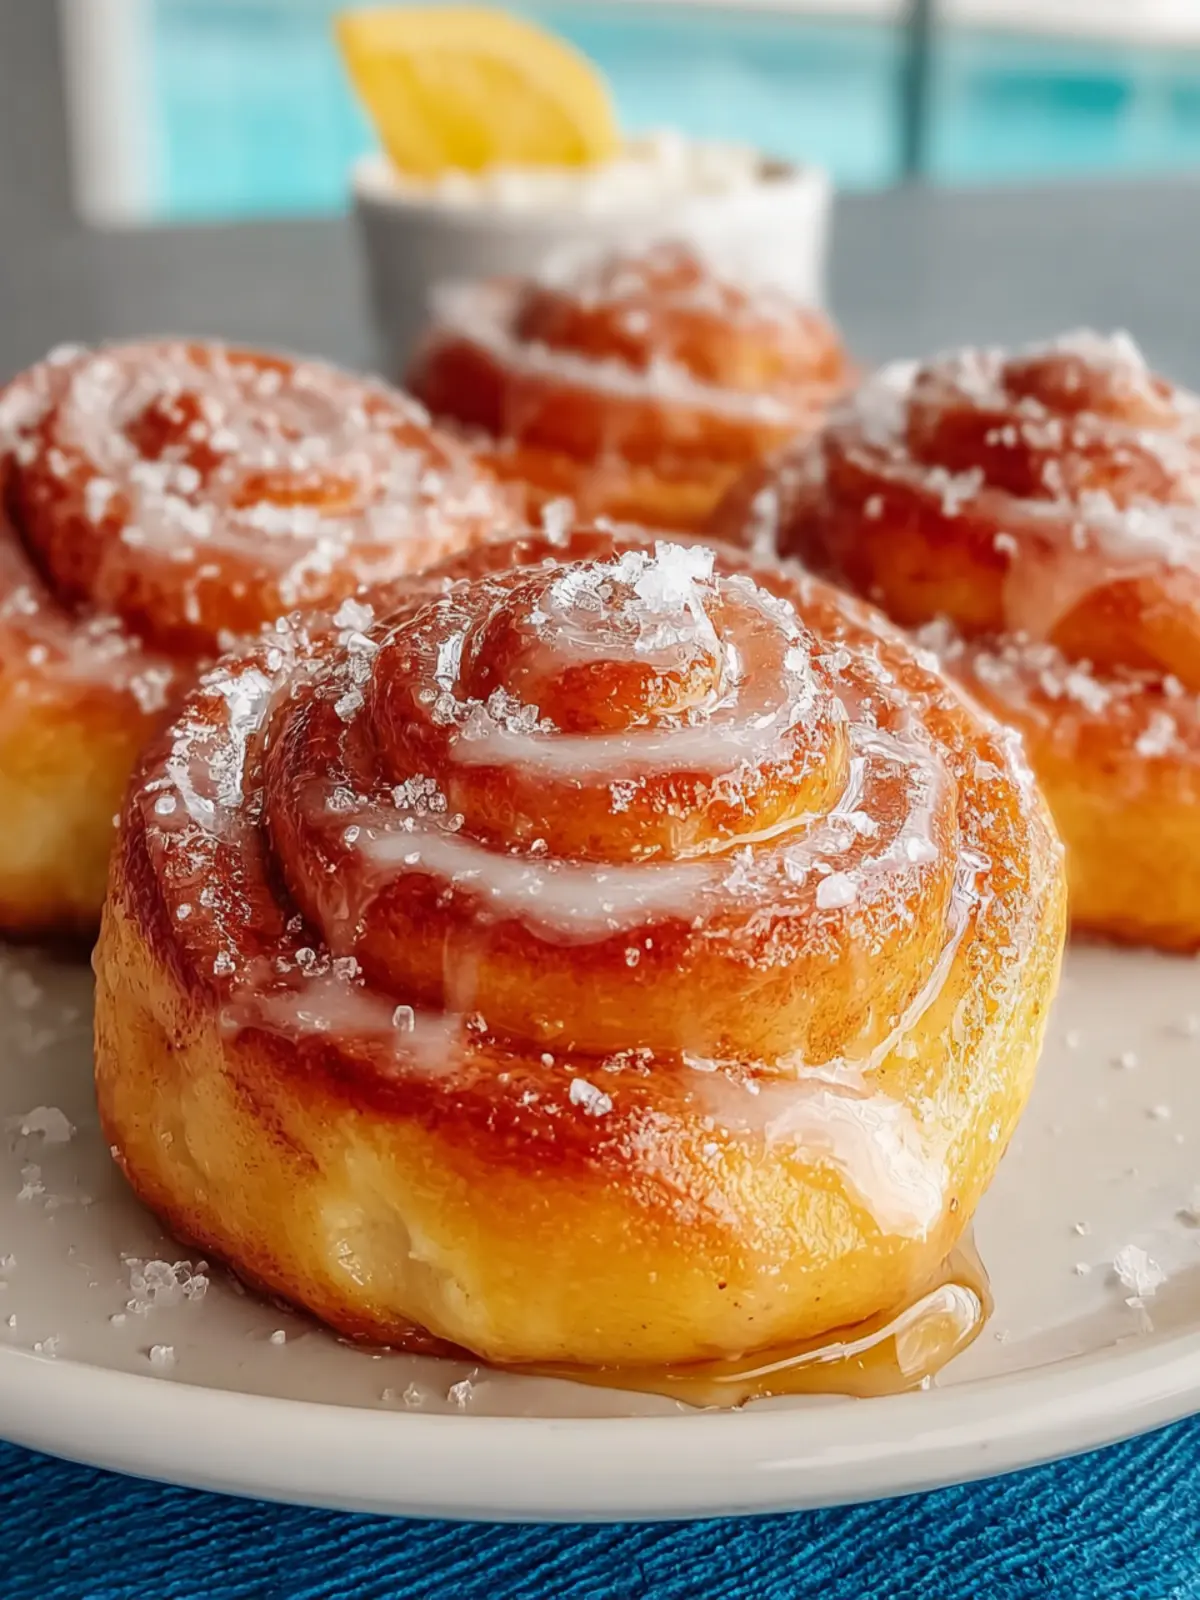
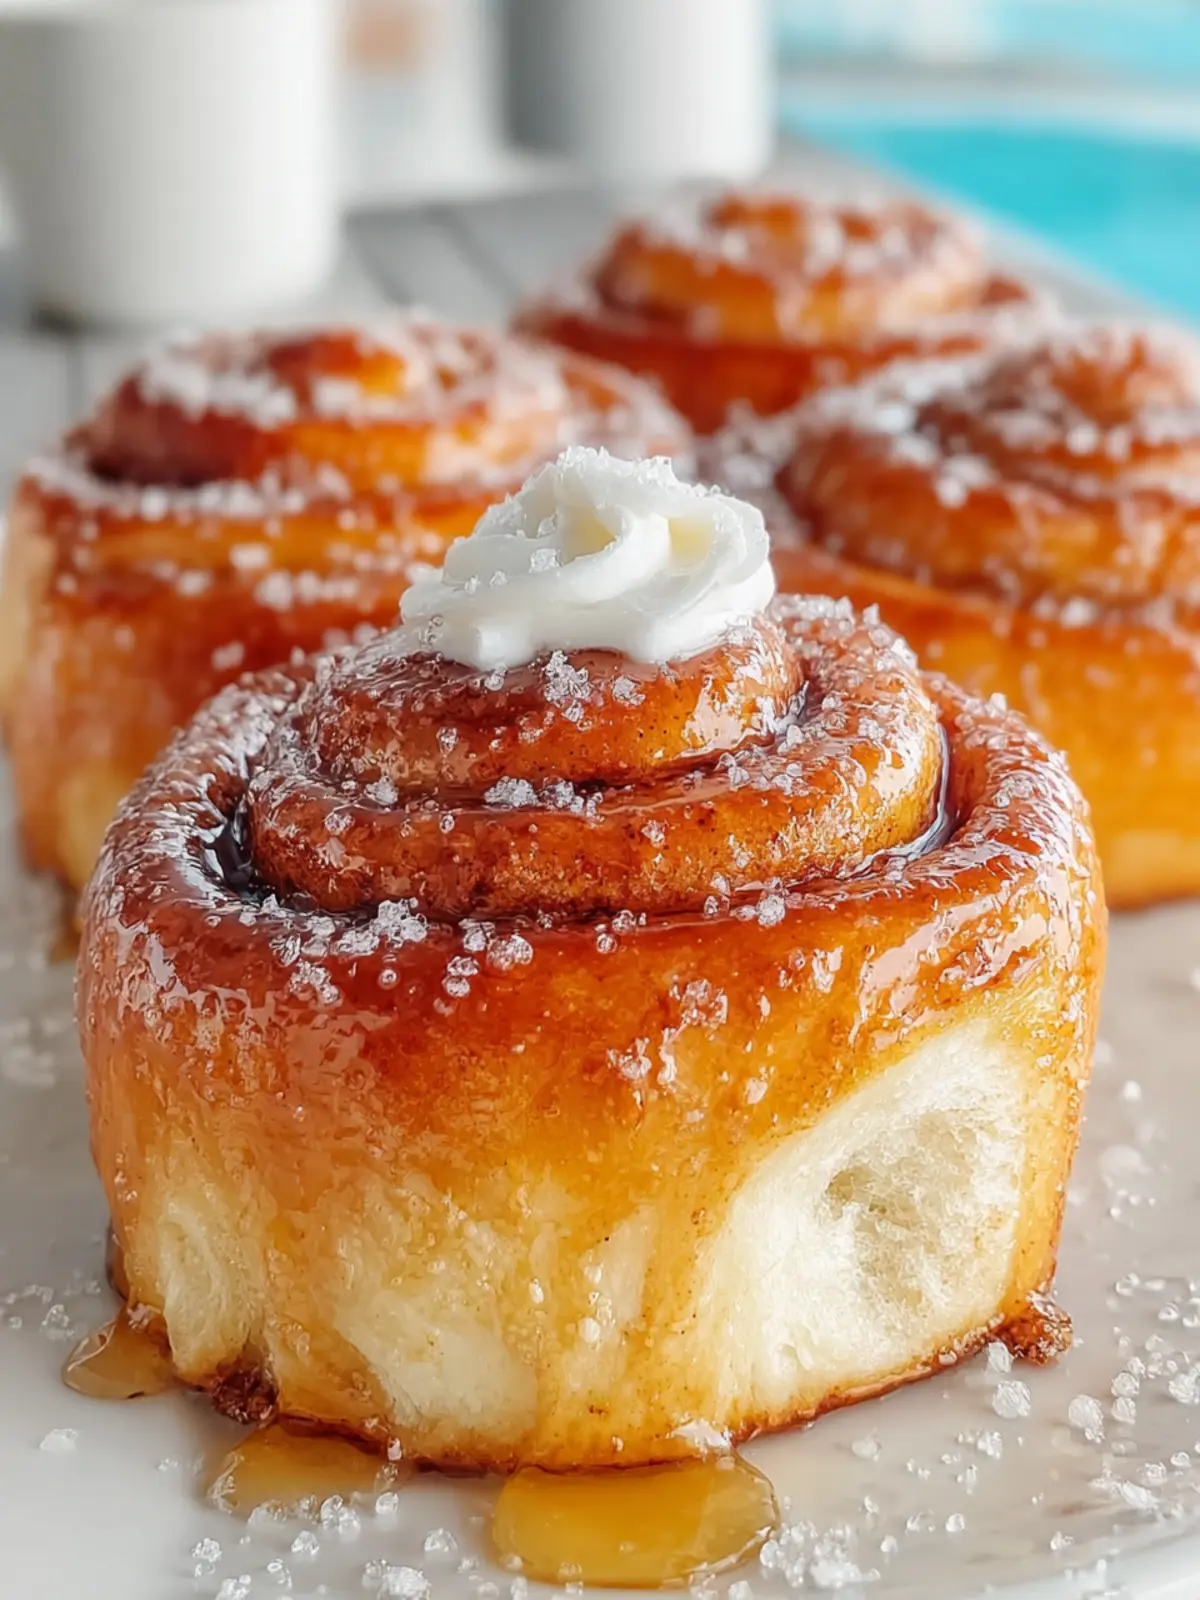
Classic Homemade Honey Buns: Irresistibly Soft and Sweet
Introduction to Classic Homemade Honey Buns
The first whiff of classic homemade honey buns rising in your kitchen can evoke the kind of nostalgia that makes you feel like a kid enjoying a sweet treat after school. Imagine the comfort of soft, pillowy dough enveloped in honey-infused goodness, and you’ll understand why these delightful pastries are so beloved. They’re not just a snack; they’re an experience, weaving together warmth, sweetness, and a touch of homemade love.
When I first set out to perfect my honey bun recipe, it was on a rainy Sunday afternoon, much like a scene from a cozy movie. The comforting sound of dough kneading, the sweet aroma of honey wafting through the air, and how the kitchen felt like a sanctuary—all those elements made me realize that making honey buns is as much about the journey as it is about the destination.
What makes honey buns so irresistible?
- Soft, Fluffy Texture: The key to the perfect honey bun is achieving that soft, fluffy texture. The right combination of yeast, flour, and liquid helps create a deliciously airy bun that practically melts in your mouth.
- Sweet Honey Flavor: The use of honey in both the dough and the glaze infuses every bite with a natural sweetness and depth that refined sugars simply can’t match.
- Versatility: Classic homemade honey buns are a canvas for creativity. You can enjoy them as they are, or add in your favorite flavors. Whether that’s a dash of cinnamon or an extra drizzle of glaze, they’re easily customizable.
- Perfect for Any Occasion: Whether you’re hosting brunch, looking for a special treat for your family, or simply indulging yourself, these honey buns fit the bill perfectly. They’re great warm from the oven or even the next day, if you can resist the temptation to eat them all at once!
Baking these classic homemade honey buns is more than just a recipe; it’s a way to create memories and share moments of joy. Let’s dive into the ingredients that make these sweet treats a beloved choice!
Key Ingredients for Classic Homemade Honey Buns
Creating classic homemade honey buns in your kitchen starts with selecting the right ingredients that bring warmth and sweetness to this beloved treat.
-
Flour: I prefer using all-purpose flour for that perfect balance of softness and structure. It captures the fluffy texture that makes these honey buns irresistible. If gluten-free is your choice, try a 1:1 gluten-free flour blend to achieve a similar consistency.
-
Yeast: Fresh active dry yeast is essential for achieving that light and airy rise. Make sure to let it bloom in warm water and sugar to awaken its full potential before adding it to the dough. This step is crucial for achieving that fluffy texture in your honey buns.
-
Milk: Whole milk adds creaminess to the dough, enhancing its richness. You could swap it with almond milk or another non-dairy option without sacrificing too much flavor.
-
Butter: I use real butter in both the dough and the glaze. It gives the honey buns a luscious richness and a lovely golden-brown color. Melt it gently to incorporate it smoothly into your mixture.
-
Honey: The star ingredient! Using pure honey not only sweetens the buns naturally, but it also contributes to their moistness and flavor. Choose a honey variety that resonates with you for a personal touch.
-
Eggs: Eggs work their magic by binding the ingredients together while adding to the tender crumb. They also enrich the flavor, making your honey buns truly scrumptious.
-
Spices: I like to sprinkle a hint of cinnamon in the dough—it adds warmth and a touch of nostalgia that complements the sweetness of the honey beautifully.
By gathering these essential ingredients, you’re setting the stage for a delightful baking experience filled with comforting aromas and a delectable end result!
Why You’ll Love This Recipe
The perfect balance of sweetness and spice
Imagine pulling a tray of classic homemade honey buns from the oven, the rich aroma drifting through your kitchen, instantly transforming it into a warm and inviting space. These honey buns strike the perfect balance between sweetness and warmly-spiced flavor. The addition of cinnamon provides a comforting warmth that pairs beautifully with the natural sweetness of honey, making every bite feel like a sweet hug.
Creating classic homemade honey buns doesn’t just satisfy your sweet tooth, but it also allows you to engage in the therapeutic process of baking. Kneading the dough can be a stress reliever, and the anticipation of the final result adds a fun element to your day. You get to decide how gooey you’ll make them—perhaps drizzling a bit more honey on top or adding an extra layer of glaze for that delightful finish.
Whether you’re sharing these treats with friends over coffee or enjoying them solo, they offer a taste of nostalgia. These honey buns remind many of simpler times—of childhood breakfasts or family gatherings. So go ahead, indulge in this delicious recipe that combines tradition with comfort in every fluffy bite. You might just find your new favorite go-to treat!

Variations of Classic Homemade Honey Buns
The beauty of classic homemade honey buns lies in their versatility. You can create a delightful twist on your cherished recipe simply by incorporating a few new ingredients or techniques. Let’s explore some variations that will take your homemade buns to the next level!
From chocolate to fruit-filled buns
Why stop at honey when you can indulge in the sweet allure of chocolate or the refreshing zing of fruit?
-
Chocolate Honey Buns: Imagine fluffy honey buns drizzled with a rich chocolate ganache. Melt some dark chocolate and mix it with a splash of cream to achieve a silky texture. Swirl it into the dough before baking for an exquisite treat.
-
Fruit-Filled Honey Buns: Want a burst of freshness? Consider adding fruit preserves like raspberry or apricot to the center of the dough before rolling it up. This fruity surprise will not only add flavor but also maintain moisture within the buns.
-
Cinnamon Roll Twist: For a fragrant variation, sprinkle cinnamon and sugar inside the dough before you roll it up. The result? Delectable cinnamon honey buns that warm the heart and home.
Each of these variations retains the essence of classic homemade honey buns while introducing exciting flavors that cater to diverse palates. Don’t be afraid to experiment—your new favorite flavor combination could be just a roll away!
Cooking Tips and Notes
Ensuring the perfect rise and tenderness
Making classic homemade honey buns can feel like an art, but with a few simple tips, you’ll create a batch that rivals your favorite bakery. The key to achieving a light and fluffy texture starts with your yeast.
-
Active Yeast: Always make sure your yeast is fresh. If you’re using active dry yeast, allow it to bloom in warm water with a pinch of sugar. This step ensures it’s alive and kicking before it meets your dough.
-
Kneading: Don’t skip the kneading step! Kneading develops gluten, which is essential for structure. Aim for a smooth, elastic dough after about 8-10 minutes of kneading by hand or 5-7 minutes in a stand mixer.
-
Proofing: Let your dough rise in a warm, draft-free environment. A good rule of thumb is to let it double in size, which usually takes about an hour. If it’s chilly in your kitchen, consider placing the dough near a warm oven.
-
Baking Time: Everyone’s oven is a little different, so keep an eye on your buns as they bake. They should be golden brown and have a delightful aroma wafting through your home—now that’s a feel-good moment!
By focusing on these details, you’ll elevate your classic homemade honey buns from good to unforgettable. Just imagine pulling a warm batch out of the oven—pure bliss!
Serving Suggestions for Classic Homemade Honey Buns
When it comes to classic homemade honey buns, enjoying them fresh from the oven is a delight, but enhancing the experience with the right beverage can turn a simple treat into a moment of bliss. Picture yourself savoring these fluffy, sweet rolls alongside your favorite drink, creating a delightful pairing that warms the heart.
Pairing with Coffee, Tea, or Warm Milk
-
Coffee: The rich notes of a freshly brewed cup of coffee complement the sweetness of honey buns perfectly. I love opting for a medium roast, as its balanced flavor contrasts beautifully with the fluffy texture of the buns. A dash of cream can enhance the richness even further—try it, and you may find yourself in a cozy café atmosphere right at home.
-
Tea: If you’re leaning towards a lighter pairing, consider a classic black tea or a fragrant Earl Grey. The citrus undertones of Earl Grey can elevate the honey flavors in the buns and provide a refreshing counterpoint. If you prefer herbal options, a chamomile blend serves as a soothing companion, perfect for unwinding after a long day.
-
Warm Milk: For a nostalgic touch, warm milk is an ideal partner. Drizzling just a little honey into the milk not only echoes the sweetness of the buns but also makes for a comforting hug in a cup.
Experiment with these pairings, and discover just how delightful your classic homemade honey buns can be. Each sip will add a new dimension to your tasting experience, making it all the more memorable.
Time Breakdown for Making Classic Homemade Honey Buns
Crafting the perfect classic homemade honey buns can be a delightful way to spend your time in the kitchen. Understanding the timeline helps you plan ahead, ensuring each stage unfolds effortlessly. Here’s your handy breakdown for a stress-free baking experience.
Preparation time
Gathering your ingredients and mixing the dough takes about 20 minutes. This gives you enough time to get everything ready while your kitchen fills with anticipation.
Rise time
Patience pays off here—let the dough rise for about 1 hour. This is when the magic happens, transforming your mixture into fluffy goodness.
Baking time
Baking these buns requires around 20 minutes. That’s just enough time for them to puff up beautifully and develop a golden crust.
Cooling time
After removing your honey buns from the oven, let them cool for about 10-15 minutes. This short waiting period enhances their flavor and texture before you dive in.
Total time
In total, you’re looking at approximately 1 hour and 55 minutes from start to finish. With this timeline in mind, you’ll have perfectly baked classic homemade honey buns ready to enjoy!
Nutritional Facts for Classic Homemade Honey Buns
Enjoying classic homemade honey buns is not just about the taste; it’s also good to know how they fit into your daily nutrition. Each fluffy bite offers a delightful blend of flavors with a nutritional profile to match.
Calories
A single serving of these sweet delights contains approximately 210 calories. While they are a treat, they can certainly be a part of a balanced diet when enjoyed in moderation.
Sugar Content
With about 8 grams of sugar per bun, these homemade honey buns satisfy your sweet tooth while still keeping it somewhat reasonable. The natural sweetness from honey contributes to this amount, making each bite uniquely delicious.
Protein
Each classic homemade honey bun provides around 3 grams of protein. While not a primary protein source, they can complement a well-rounded meal or snack when paired with something rich in protein, like yogurt or a glass of milk.
Now that you’re in the know about the nutrition behind these delectable treats, you can enjoy them guilt-free!
FAQ about Classic Homemade Honey Buns
Baking a batch of classic homemade honey buns can fill your kitchen with a delightful aroma that’s hard to resist. But as you embark on this sweet journey, questions might pop up. Here’s a helpful FAQ to guide you through the process.
Can I use instant yeast instead of active dry yeast?
Absolutely! You can use instant yeast in place of active dry yeast in your classic homemade honey buns. The benefit of instant yeast is that it doesn’t require proofing beforehand – simply mix it directly with your dry ingredients. You may want to reduce the amount slightly, as instant yeast is more potent. Typically, a 1:1 substitution works well, but feel free to experiment. Your honey buns will still turn out fluffy and delicious!
How do I store leftover honey buns?
If you find yourself with leftover classic homemade honey buns, storing them properly is key to maintaining their freshness. First, allow them to cool completely. Then, place them in an airtight container at room temperature for up to three days. If you’d like to keep them longer, wrap each bun individually in plastic wrap and then store them in the freezer for up to three months. Just thaw and warm them up when you’re ready to indulge again!
What can I substitute for milk in this recipe?
For those who may need a classic homemade honey buns recipe without dairy, there are plenty of alternatives. Almond milk, soy milk, or oat milk can easily replace regular milk in your dough. Each option brings its unique flavor, so you can choose whichever suits your taste best. If you’re looking for something more robust, coconut milk can add a delightful twist to your buns!
By keeping these insights in mind, you’re well on your way to mastering the art of making perfect honey buns at home. Happy baking!
Conclusion on Classic Homemade Honey Buns
In savoring classic homemade honey buns, you’re not just enjoying a delightful treat; you’re also creating a heartwarming experience for friends and family. The delightful aroma wafting through your kitchen, the golden-brown hue, and the sweet, sticky honey glaze are all aspects that make this recipe so special. Perhaps you’ll share them during a cozy brunch or at a family gathering, creating memories with each bite. Remember, the joy of making these rolls comes from both the process and the smiles they bring. So, embrace the art of baking, and enjoy every delectable moment of your classic homemade honey buns!
Print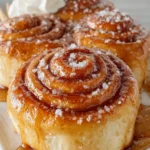
Cinnamon Rolls
- Total Time: 1 hour 38 minutes
- Yield: 12 rolls 1x
- Diet: Vegetarian
Description
Delicious homemade cinnamon rolls topped with a sweet glaze.
Ingredients
Scale
- 3 ½ cups all-purpose flour
- 2 ¼ tsp active dry yeast
- 1 cup whole milk
- ¼ cup granulated sugar
- ½ tsp salt
- 1 large egg
- ¼ cup unsalted butter (melted)
- ¼ cup unsalted butter (softened, for filling)
- ½ cup brown sugar (for filling)
- 1 tbsp ground cinnamon (for filling)
- ¼ cup honey (for glaze)
- 1 cup powdered sugar (for glaze)
- 2 tbsp unsalted butter (melted, for glaze)
- 1 tsp vanilla extract (for glaze)
Instructions
- Warm milk to about 110°F, then combine with sugar and yeast. Let sit until foamy.
- Mix in egg, melted butter, salt, and gradually add flour until dough forms.
- Knead for 8 minutes until smooth. Cover and let rise for 1 hour until doubled.
- Mix softened butter, cinnamon, and brown sugar for filling.
- Roll dough into rectangle, spread filling evenly.
- Roll tightly and slice into 1-inch rolls.
- Place rolls on greased baking tray. Cover and rise 30-40 minutes.
- Bake at 350°F for 15–18 minutes until golden brown.
- Mix honey, powdered sugar, melted butter, and vanilla to make glaze.
- Glaze warm buns and let set before serving.
Notes
- Ensure the milk is warm but not too hot to preserve the yeast.
- You can add nuts or raisins to the filling for extra flavor.
- Prep Time: 20 minutes
- Cook Time: 18 minutes
- Category: Dessert
- Method: Baking
- Cuisine: American
Nutrition
- Serving Size: 1 roll
- Calories: 250
- Sugar: 10g
- Sodium: 150mg
- Fat: 8g
- Saturated Fat: 5g
- Unsaturated Fat: 2g
- Trans Fat: 0g
- Carbohydrates: 38g
- Fiber: 1g
- Protein: 4g
- Cholesterol: 30mg