Follow Me On Social Media!
Cream Wafer Sandwich Cookie Recipe: Irresistibly Creamy Delight
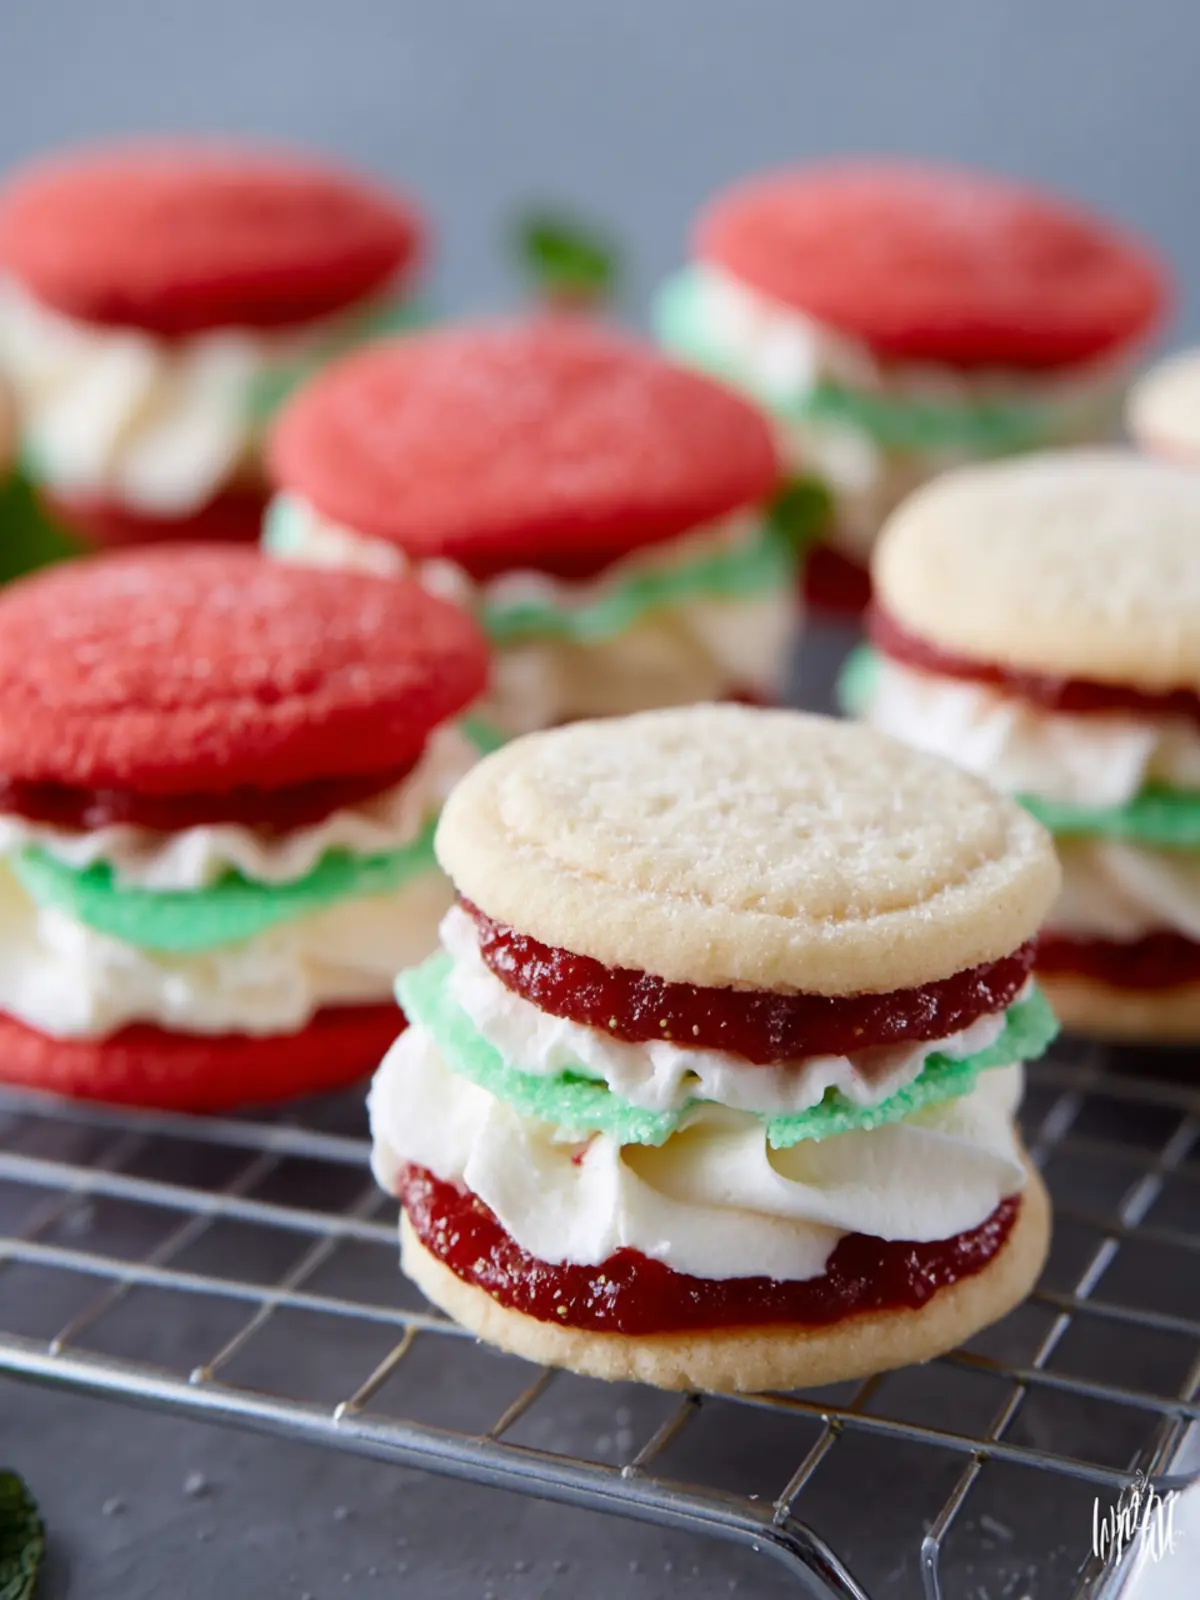
Introduction to Cream Wafer Sandwich Cookies
Imagine the delight of biting into a cream wafer sandwich cookie and feeling the crunch of delicate wafers giving way to a smooth, rich cream filling. These cookies aren’t just a treat; they are an experience, transporting you back to childhood afternoons filled with laughter, snacks, and the sweet smell of baking wafting through the air. If you’re seeking to recreate that joy in your kitchen, look no further. This is the perfect opportunity to whip up a batch of these delightful cookies that will impress anyone lucky enough to share them with you!
What are Cream Wafer Sandwich Cookies?
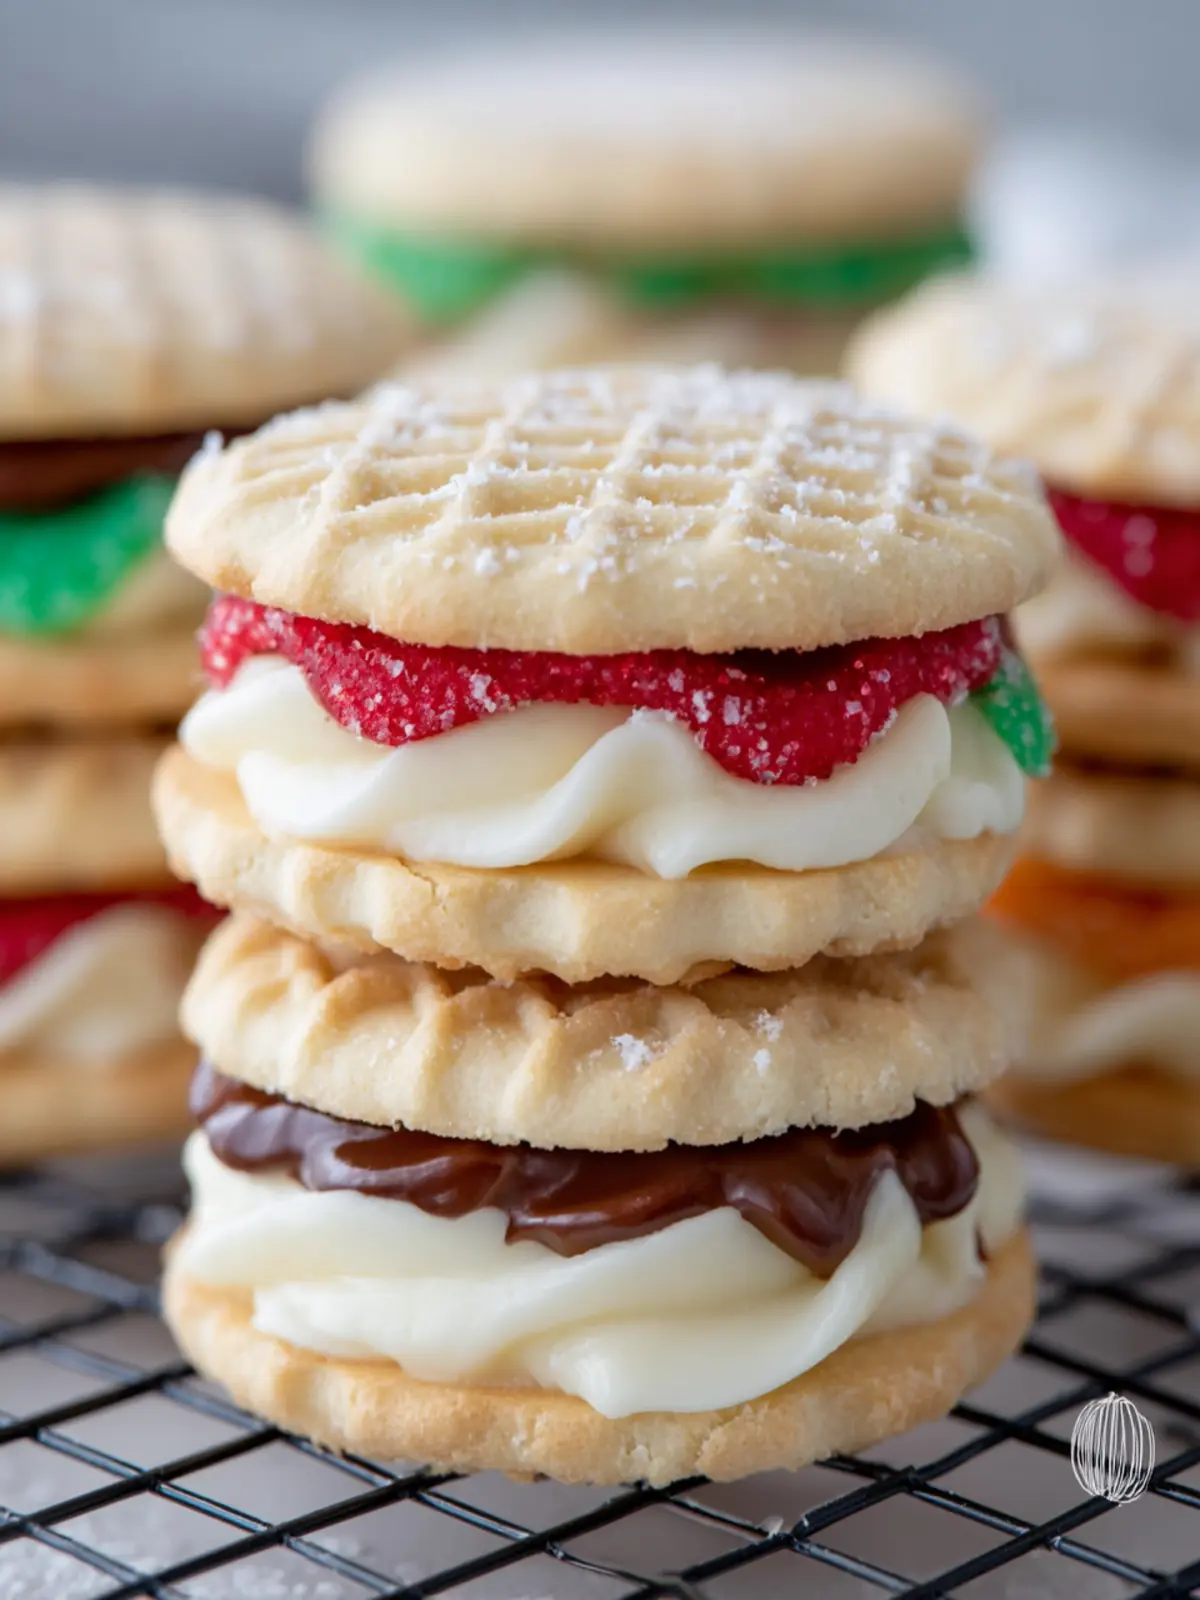
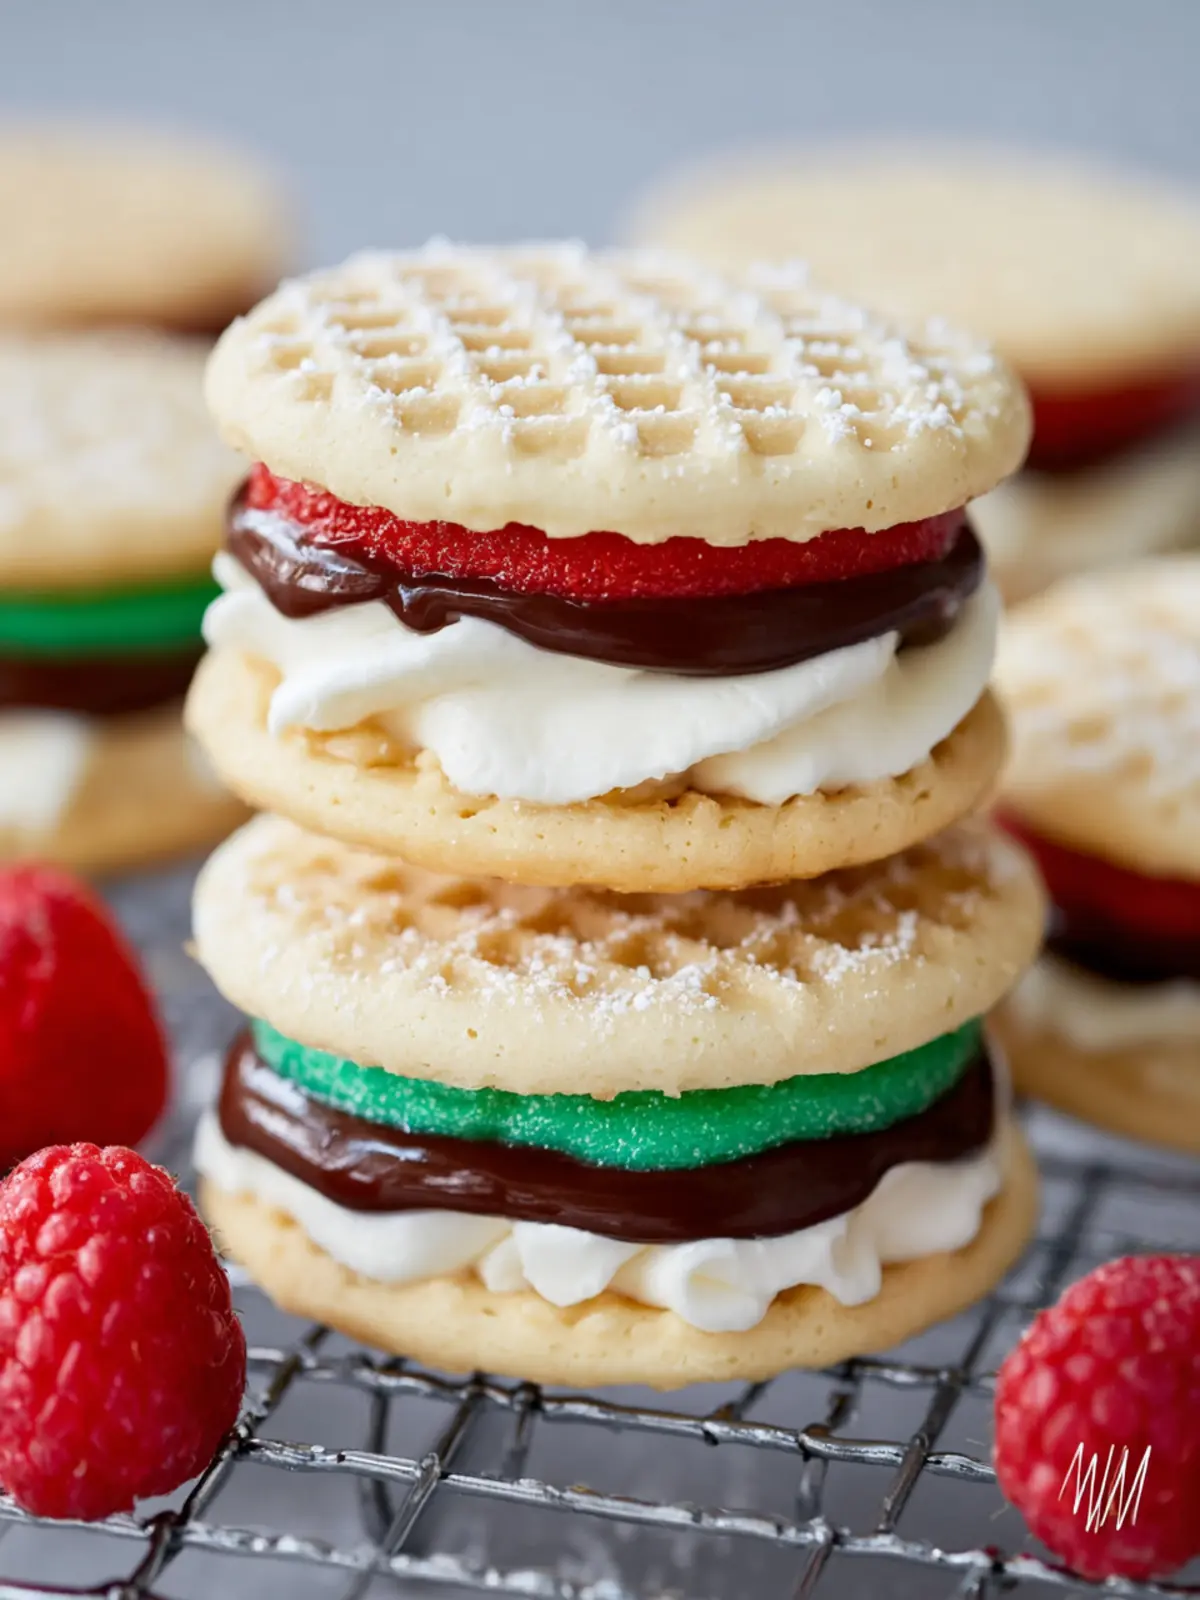
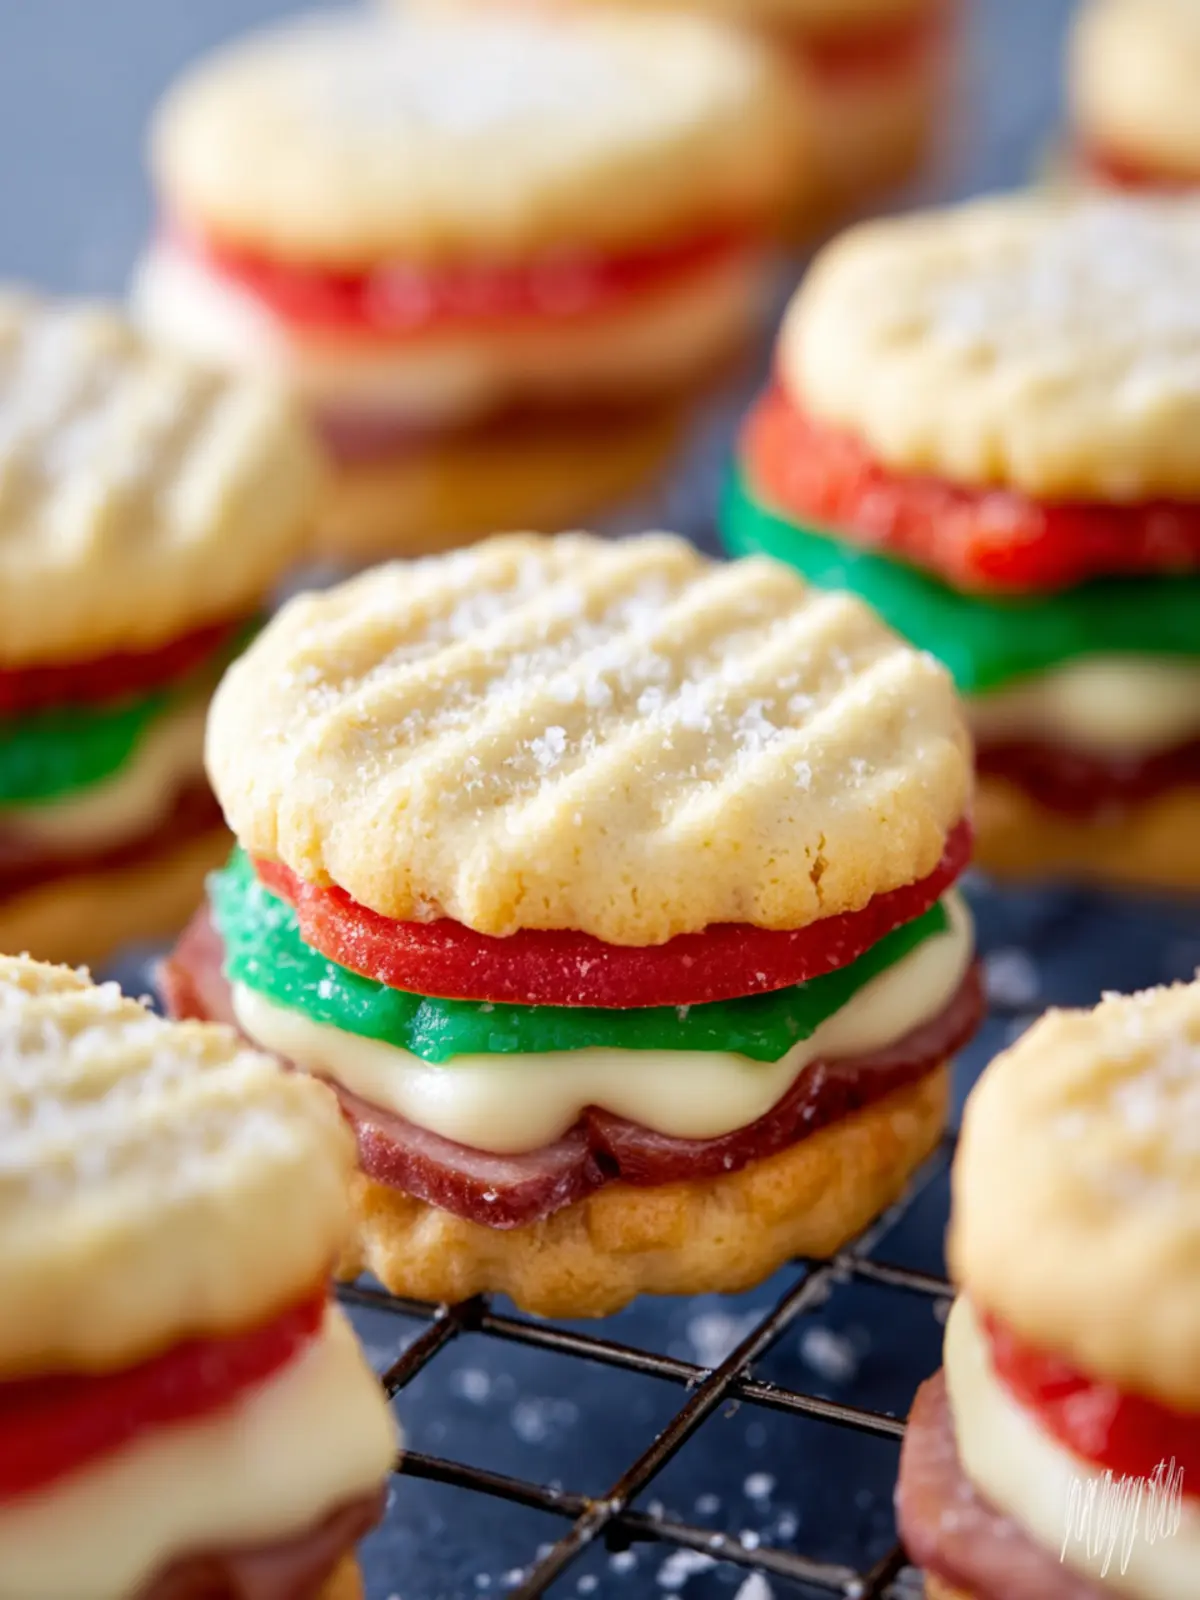
Cream wafer sandwich cookies are the perfect fusion of lightness and indulgence. These cookies typically consist of two thin, crispy wafer shells that create a lovely contrast to the sweet and creamy filling nestled between them. What makes them truly special is their versatility; the filling can be made with various flavors, from classic vanilla and chocolate to more adventurous options like peppermint or lemon.
Whether they are served at a festive gathering, as a delightful afternoon snack, or even as a special surprise for someone you care about, these cookies never fail to bring a smile. Their elegant appearance and delectable taste make them a wonderful choice for any occasion.
Imagine serving these at your next gathering, casually placed on a platter, inviting guests to take a bite. They’re also a fantastic way to treat yourself when you need a moment of bliss after a long day. Plus, making your own cream wafer cookies allows you to control the ingredients and flavors—perfect for adapting to personal dietary preferences or exploring your favorite flavor profiles.
In our comprehensive cream wafer sandwich cookie recipe, you’ll learn step-by-step how to create these delightful cookies in your own kitchen. Grab your baking essentials, and let’s get started on this delicious adventure!
Key Ingredients for Cream Wafer Sandwich Cookies
Creating the perfect cream wafer sandwich cookie recipe begins with selecting the right ingredients. Each component plays a vital role in achieving that delightful texture and flavor that makes these cookies unforgettable.
Butter: Quality butter is crucial for rich flavor. I always opt for unsalted butter; it allows me to control the salt levels in my cookies, ensuring a balanced taste. Make sure it’s softened to room temperature for easy mixing.
Sugar: I use a combination of granulated sugar and powdered sugar. The granulated sugar gives the cookies structure, while the powdered sugar results in a smooth, creamy filling that melts in your mouth.
Flour: For this recipe, all-purpose flour is ideal. It provides the cookies with the right texture—crispy yet tender. If you’re looking for a gluten-free alternative, a 1:1 gluten-free flour blend can work just as well.
Vanilla Extract: A splash of pure vanilla extract enhances the flavor profile, making each bite a little more fragrant. It’s a simple ingredient, but it makes all the difference in the taste.
These key ingredients form the foundation of your cream wafer sandwich cookie recipe, promising a delicious treat every time you make them!
Why You’ll Love This Recipe
Indulging in a cream wafer sandwich cookie recipe is not just about creating a delicious dessert; it’s about crafting memories that last a lifetime. Imagine a sunny afternoon with friends or family gathered around the kitchen table, each of you savoring these light, crunchy cookies filled with creamy goodness. This recipe is perfect for those moments that deserve a sweet treat.
The appeal of these cookies lies in their delightful texture. The crisp wafers provide a satisfying crunch, while the smooth filling melts in your mouth with every bite. You can easily customize the filling, whether you prefer classic vanilla, rich chocolate, or even a zesty twist with lemon or orange flavors. Not to mention, they are a fantastic option for gatherings or as a thoughtful gift for loved ones, showing that you care.
One bite will transport you back to childhood moments spent in the kitchen, giggling and sharing stories as you help assemble these delicious cookies. The joy of making and sharing your own cream wafer sandwich cookies comes not just from the final product but from the experience itself. Whether you’re a seasoned baker or just starting out, this recipe invites you to indulge and create lasting memories. So why wait? Dive into this delightful adventure of flavor and creativity!
Variations on Cream Wafer Sandwich Cookies
Exploring delightful twists on the classic cream wafer sandwich cookie recipe can transform your baking experience into a flavorful adventure. Here are some variations that can elevate your cookies beyond the traditional!
Flavorful Fillings
-
Chocolate Hazelnut: Slather on some chocolate hazelnut spread instead of traditional frosting. It’s a rich, nutty treat that pairs beautifully with the light wafer.
-
Berry Jam: For a fruity kick, layer your cookies with raspberry or strawberry jam. The sweet-tartness contrasts wonderfully with the creaminess of the cookie.
-
Matcha Cream: Mix powdered matcha into your buttercream for a sophisticated green tea flavor. It’s a lovely, slightly earthy alternative.
Unique Textures
-
Crunchy Additions: Fold in some finely chopped nuts or crushed cookies into your filling for an extra crunch that complements the smooth wafer.
-
Sprinkles or Coconut: Roll the edges of your filled sandwich cookies in colorful sprinkles or shredded coconut for a fun and festive look.
Seasonal Favorites
- Pumpkin Spice: In the fall, incorporate pumpkin puree and spices into your filling for a seasonal treat that evokes cozy autumn vibes.
These variations allow you to adapt the cream wafer sandwich cookie recipe to suit any occasion or craving, making it a versatile dessert that everyone can enjoy!
Cooking Tips and Notes for Cream Wafer Cookies
Creating the perfect cream wafer sandwich cookies can be a delightful adventure in your kitchen. These delicate treats are not only easy to make but also allow for plenty of creativity. Here are some handy tips to elevate your baking game.
Choosing the Right Flour
For this cream wafer sandwich cookie recipe, all-purpose flour is the go-to choice. If you’re aiming for a lighter texture, consider using cake flour instead. It can make your wafers slightly more tender, which works beautifully for these cookies.
Chilling Is Key
Patience pays off! After making the dough, try refrigerating it for about 30 minutes. Chilling not only helps the cookies maintain their shape but also enhances the flavors.
Rolling Technique
When rolling out the dough, aim for a consistent thickness. If it’s too thick, your cookies might not bake evenly; if too thin, they could burn. A good rule of thumb is about a quarter-inch thickness for those perfectly crispy wafers.
Filling Options
Get creative with your fillings! While the recipe offers a classic creamy filling, feel free to experiment with flavored buttercreams or even fruit jams for a twist.
Storage Tips
These cookies are best enjoyed fresh, but if you need to store them, place them in an airtight container. They’ll stay crisp longer when kept away from moisture.
Following these tips ensures your cream wafer sandwich cookies turn out dreamy every time. Happy baking!
Serving Suggestions for Cream Wafer Sandwich Cookies
These delightful cream wafer sandwich cookies offer a versatile canvas for your dessert creativity. One of the best parts of making them is how easily they lend themselves to various serving ideas.
-
Pair with Coffee or Tea: For a comforting afternoon treat, enjoy these cookies with a warm cup of coffee or your favorite tea. The cream filling complements the warmth and bitterness of the beverage beautifully.
-
Ice Cream Sandwiches: Want to make a special dessert even more indulgent? Use two cookies to create an ice cream sandwich. Choose flavors that harmonize with your cream filling—vanilla works wonderfully, or try something adventurous like mint chocolate chip.
-
Garnish with Fresh Fruits: Consider serving your cookies alongside a bowl of fresh berries or sliced fruits. The tartness balances the sweetness perfectly and adds a refreshing twist.
-
Presentation Matters: Arrange your cookies on a decorative platter for a holiday gathering or casual get-together. Dusting them with powdered sugar adds an elegant touch.
Experimenting with these suggestions will elevate your cream wafer sandwich cookie recipe from delightful to memorable. Enjoy every bite!
Time Breakdown for Making Cream Wafer Sandwich Cookies
Preparation Time
To kick off your delightful journey of making cream wafer sandwich cookies, set aside about 30 minutes for preparation. This is where you’ll measure, mix, and prep your ingredients. Make sure everything is ready to go, as this will streamline the process.
Chilling Time
After mixing your dough, the chilling phase is crucial. Give it a good hour to rest in the refrigerator. This not only enhances the flavors but also allows for easier rolling and cutting.
Baking Time
The baking process is swift and satisfying. Expect around 10-12 minutes in the oven. Keep an eye on those cookies as they transform from raw dough to golden perfection.
Total Time
Altogether, you’re looking at roughly 1 hour and 50 minutes from start to finish for your cream wafer sandwich cookies. Trust me, the end result makes every minute worth it!
Nutritional Facts for Cream Wafer Sandwich Cookies
Delving into the cream wafer sandwich cookie recipe allows us to savor not just the deliciousness but also the nutrition behind this delightful treat. Here’s a closer look at the essential nutritional values you’ll find in these cookies.
Calories
Each cookie brings about 100 calories, making it a sweet indulgence without going overboard, perfect for those moments when you need a little pick-me-up.
Carbohydrates
With approximately 15 grams of carbohydrates per cookie, these treats provide a satisfying energy source, ideal for your mid-afternoon snack.
Sugar
Among the key components, each cookie contains around 5 grams of sugar. This balance brings just enough sweetness to satisfy your cravings without overwhelming your palate.
Enjoy this guilt-free pleasure as you experiment with our cream wafer sandwich cookie recipe!
FAQs about Cream Wafer Sandwich Cookies
Baking your own cream wafer sandwich cookies at home can be an absolute joy, as you get to craft delicious treats tailored to your tastes. However, even experienced bakers may have questions about perfecting these delightful confections. Here are some frequently asked questions to help you navigate your baking adventure.
How to ensure cookies don’t spread while baking?
To keep your cream wafer sandwich cookies from spreading too much while baking, consider these tips:
- Chill the Dough: After mixing your cookie dough, refrigerate it for at least 30 minutes. This solidifies the fats and helps maintain their shape.
- Proper Measurements: Make sure to measure your flour correctly! Too little flour can result in spreading. Using the spoon and level method ensures accuracy.
- Bake at the Right Temperature: Preheat your oven fully. A hot oven helps the cookies set faster, reducing spread.
Can I make these cookies in advance?
Absolutely! You can prepare the cream wafer sandwich cookies in advance and store them.
- Unbaked Dough: Wrap the dough tightly in plastic wrap and refrigerate for up to three days, or freeze for up to three months. Just thaw in the refrigerator before baking.
- Baked Cookies: You can also bake the cookies ahead of time. Store them in an airtight container for up to a week, or freeze them without the filling.
What can I substitute for heavy cream in the filling?
If you find yourself without heavy cream, don’t worry! Here are some suitable substitutes for your cream wafer sandwich cookie recipe:
- Cream Cheese: This will add a rich and tangy flavor, making your filling extra decadent. Just soften it before mixing!
- Coconut Cream: A great dairy-free option that adds a slight tropical flavor.
- Greek Yogurt: For a lighter filling, use plain Greek yogurt mixed with a bit of powdered sugar.
Using these alternatives can create a different but equally delightful cookie experience. Enjoy experimenting!
Conclusion on Cream Wafer Sandwich Cookies
In wrapping up our delightful journey through the cream wafer sandwich cookie recipe, it’s clear that these cookies offer more than just a sweet treat; they create moments of joy and connection. With their delicate layers and creamy filling, they are perfect for sharing with friends or savoring during a quiet evening at home.
As you experiment with flavors and fillings, don’t be afraid to add your personal touch—it’s what makes cooking truly special. Your kitchen can transform into a haven of creativity, where every batch of cookies tells a story. Enjoy the process, and happy baking!
Print
Buttercream Sandwich Cookies
- Total Time: 2 hours 24 minutes
- Yield: 24 cookies 1x
- Diet: vegetarian
Description
Delicious sandwich cookies filled with creamy buttercream, perfect for any occasion!
Ingredients
Scale
- 1 cup unsalted butter (softened)
- 1/3 cup heavy cream
- 2 cups flour
- 1/2 cup granulated sugar (for dusting)
- 1/2 cup unsalted butter (softened)
- 1/4 teaspoon kosher salt
- 1 1/2 cup confectioner’s sugar
- 2 teaspoons vanilla
- 2–4 tablespoons heavy cream
- Food coloring (optional)
Instructions
- In the bowl of a stand mixer (or with a hand mixer), beat the butter 3-5 minutes until it’s light and fluffy. With the mixer on low, slowly add the flour and then the cream. Mix until just combined. Cover and refrigerate the dough for at least two hours or overnight.
- Preheat oven to 375 degrees F.
- On a lightly floured surface, roll out the dough to a 1/8-inch thickness. Cut with a round cookie cutter.
- Add the sugar to a separate small bowl. Press one of the cut out circles into the sugar. Then, place on an ungreased cookie sheet. Prick with a toothpick or fork. Repeat with remaining circles.
- Bake 7-9 minutes, removing the cookies from the oven just before they start to brown. Remove them from the cookie sheet to cool.
- In the meantime, make the filling. In the bowl of a stand mixer (or with a hand mixer), cream the butter and salt until light and fluffy (This will take 3-5 minutes.) With the mixer on low, add the powdered sugar, 2 tablespoons of heavy cream, and vanilla. Then add the food coloring. If the filling seems too thick, add more heavy cream until desired consistency is achieved.
- To easily frost the cookies, put the filling in a piping bag. Once the cookies are cool, pipe the filling on the back of one cookie. Top with another cookie and press to secure.
- Pack and store in an airtight container.
Notes
- Best if refrigerated before serving.
- Can be decorated with sprinkles or additional food coloring.
- These cookies can be frozen for later enjoyment.
- Prep Time: 15 minutes
- Cook Time: 9 minutes
- Category: Dessert
- Method: baking
- Cuisine: American
Nutrition
- Serving Size: 2 cookies
- Calories: 150
- Sugar: 10g
- Sodium: 50mg
- Fat: 8g
- Saturated Fat: 5g
- Unsaturated Fat: 2g
- Trans Fat: 0g
- Carbohydrates: 18g
- Fiber: 0g
- Protein: 2g
- Cholesterol: 30mg